 how-to
Scaling CrossFit for Shoulder Injuries: A Practical Guide
Table of Contents
- Assess Your Shoulder Before You Scale
- CrossFit Shoulder Injury Modifications by Movement
- CrossFit Alternatives to Overhead Movements
- Working Out With a Torn Shoulder: Load Management and Progression
- Shoulder Mobility and Scapular Stability Drills
- CrossFit Shoulder Injury Recovery: Communicating With Your Coach
- When to Stop Training and Seek Medical Care
- Frequently Asked Questions
Last Updated: October 10, 2026
Assess Your Shoulder Before You Scale
Before you modify any CrossFit workout, you need to understand what's actually limiting your shoulder. A real assessment takes just a few minutes and tells you exactly which movements to scale and which you can still do safely. (Source: a 2023 report by the National Institutes of Health)
At Warrior Welke CrossFit l/Hyrox, we start every scaled program with the same question: where does it hurt, and what makes it worse? That information drives everything else.
Range of Motion and Movement Limitations
Range of motion (ROM) is your starting point. If your shoulder can't reach a certain position, loading that position will only create more pain. Simple tests tell you what's restricted.
Check these movements without weight:
- Raise your arm straight overhead
- Rotate your arm internally (hand behind your back)
- Rotate your arm externally (elbow bent, rotating palm away)
- Reach across your chest with the opposite arm pulling gently
Notice where you feel tightness or pain. That's your ROM ceiling. Anything requiring more range than you have right now gets scaled.
A common mistake is pushing through limited ROM. Your body will compensate by using other muscles, which creates new problems. Work within what you have today.
Pain-Monitoring Framework During Training
Pain during a workout tells you something. Learning to read it is the difference between smart scaling and re-injury.
Use this simple framework:
- Green (0-3/10 pain): Safe to continue. This is normal muscle fatigue.
- Yellow (4-6/10 pain): Reduce load or reps. Modify the movement. Stop if pain worsens.
- Red (7+/10 pain or sharp pain): Stop immediately. Do not finish the set. Scale to a completely different movement.
The key: pain should not increase during the set. If rep 3 hurts more than rep 1, stop. If pain lingers after the workout, you overdid it.
CrossFit Shoulder Injury Modifications by Movement
Not every movement needs to be eliminated. Most can be scaled by changing range, load, or equipment. Here's how to modify the movements that most often cause shoulder pain.
Overhead Pressing Movements
Overhead pressing, strict press, push press, push jerk, loads the shoulder in its most vulnerable position. Scaling for shoulder injuries means reducing range, load, or switching the angle.
Scaling options for overhead pressing movements:
- Reduce range: Press to chin height instead of overhead. This keeps tension off the shoulder joint.
- Reduce load: Use lighter dumbbells or a lighter barbell. Pain usually improves with 30-50% less weight.
- Switch the angle: Landmine press (pressing at an angle) is often less painful than straight overhead.
- Replace entirely: Dumbbell floor press or machine press if overhead is too aggravating.
A torn shoulder often cannot tolerate heavy overhead work. Start with light loads and high reps. If overhead pressing causes sharp pain, skip it for 2-3 weeks and focus on mobility and rotator cuff work instead.
Pulling Movements and Rig Work
Pull-ups, ring rows, and bar-hanging movements challenge the shoulder's stability. Scaling here means reducing the demand on your rotator cuff and scapular muscles.
Scaling options for pulling movements:
- Band-assisted pull-ups: Bands reduce the load on your shoulder. Use a stronger band if needed.
- Reduce range: Partial pull-ups (chin over bar, not full range) lower the demand.
- Switch to rows: Inverted rows or ring rows are often easier on injured shoulders than pull-ups.
- Reduce volume: Do fewer reps or sets. Three sets of three pull-ups is better than five sets of eight if you're injured.
- Avoid: Dead hangs and kipping pull-ups. Both stress the shoulder joint.
The rig, pull-up bar, rings, rope, can be used for shoulder-friendly work. Scapular pulls (pulling shoulder blades down without bending elbows) build stability without heavy load.
Pushing Movements and Push-Ups
Push-ups, dumbbell presses, and bench press demand shoulder stability. For a torn shoulder or restricted range, these need modification.
Scaling options for pushing movements:
- Reduce range: Partial push-ups (hands elevated on a box or bench) lower the demand on the shoulder.
- Switch to machines: Machine chest press or Smith machine press control the range for you.
- Use dumbbells: Dumbbells allow a shorter range than a barbell. They also let each arm work independently.
- Reduce reps: Five sets of three reps is better than three sets of ten if you're injured.
- Avoid: Weighted dips. They load the shoulder in a disadvantageous position.
Push-ups are a staple in CrossFit, but a torn shoulder often cannot tolerate them. Substitute with dumbbell floor press, machine press, or band-resisted chest press.
CrossFit Alternatives to Overhead Movements
When overhead pressing and pulling are too painful, you need alternatives that still challenge your fitness without stressing the shoulder.
Lower-body and core alternatives:
- Squats (air, goblet, back, front)
- Deadlifts and variations
- Lunges and step-ups
- Sled push and sled drag
- Core work (planks, carries, Pallof press)
Upper-body alternatives that spare the shoulder:
- Dumbbell floor press
- Machine chest press
- Landmine press
- Rows (machine, cable, dumbbell)
- Farmer carries and suitcase carries
A good workout for a shoulder injury includes lower-body strength, core work, and upper-body pulling or pressing that doesn't aggravate the joint. Talk to your coach about building a version of the day's workout that hits similar energy systems without the overhead movement.
Working Out With a Torn Shoulder: Load Management and Progression
Scaling for shoulder injuries isn't just about modifying movements. It's about managing total load and gradually returning to full training.
Training Volume and Intensity Adjustments
Training volume is total reps × weight. Reduce it when your shoulder is injured.
Intensity (how heavy, how fast) should also decrease. A torn shoulder cannot tolerate heavy loads or high-speed movements.
Example: Instead of five sets of five reps at 185 pounds, do five sets of five reps at 115 pounds.
Reduce intensity gradually. After a week at 60% of your normal load, try 70%. If pain stays low, increase to 80%. This progression prevents re-injury.
Staged Return-to-Training Plan
A structured return prevents setbacks. Follow these stages, spending 1-2 weeks in each.
Stage 1: Pain-free movement (weeks 1-2)
- Light mobility and stability drills daily
- No loaded overhead work
- Reduce training volume by 50%
- Focus on lower body and core
Stage 2: Light loading (weeks 3-4)
- Introduce light overhead pressing (empty bar or light dumbbell)
- Increase training volume to 70% of normal
- Continue daily mobility work
- Monitor pain closely
Stage 3: Moderate loading (weeks 5-6)
- Progress to 80% of normal load
- Increase reps and sets gradually
- Reduce mobility work to 3-4 days per week
- Return to some pulling movements if pain-free
Stage 4: Full return (weeks 7-8)
- Return to normal load and volume
- Continue mobility work 2-3 times per week
- Monitor for pain during high-intensity workouts
- Scale if pain returns
Each stage assumes pain stays in the green zone (0-3/10). If pain spikes, drop back to the previous stage for another week.
Shoulder Mobility and Scapular Stability Drills
Mobility and stability work accelerates healing and prevents re-injury. These drills take 10-15 minutes daily and are non-negotiable for scaling CrossFit for shoulder injuries.
Mobility Work for Shoulder Extension and Range
Mobility drills restore range of motion. Do these before training and on rest days.
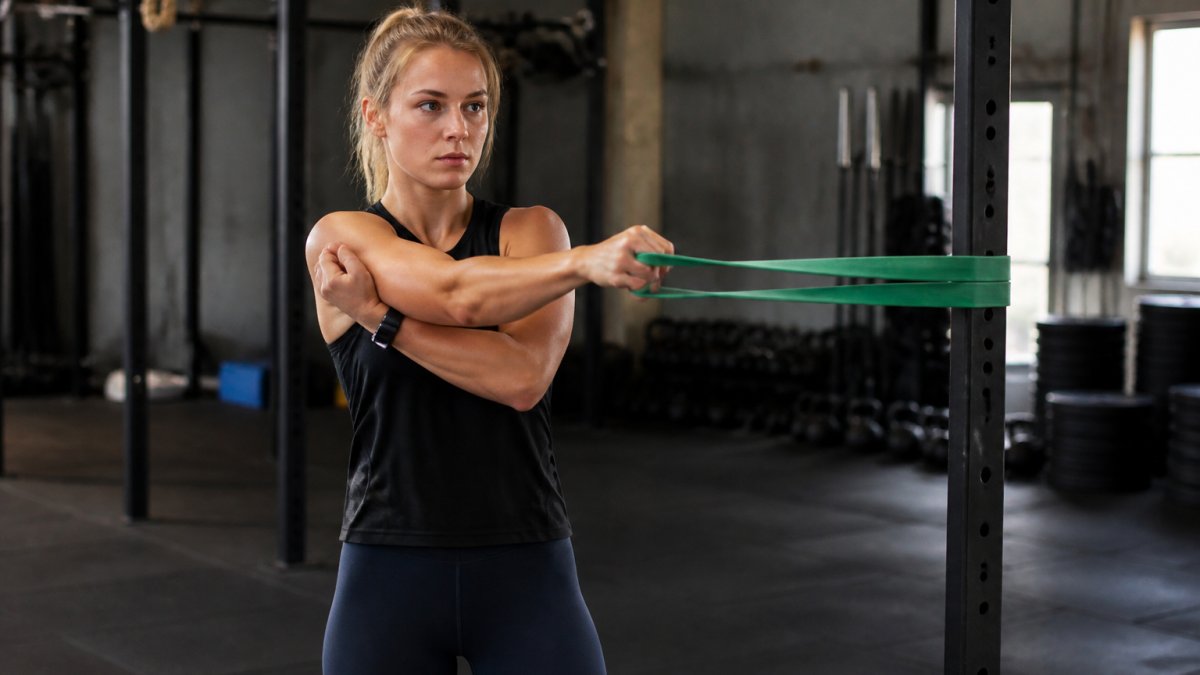
Banded shoulder stretch: Loop a band around a rig or bar at shoulder height.
Sleeper stretch: Lie on your side.
PVC pipe shoulder pass-through: Hold a PVC pipe with a wide grip.
Foam roller thoracic extension: Lie on a foam roller placed horizontally under your mid-back. Support your head with your hands.
These drills improve range and reduce stiffness. Do them daily, even on rest days.
Rotator Cuff and Scapular Strength Exercises
Strength work stabilizes the shoulder joint.
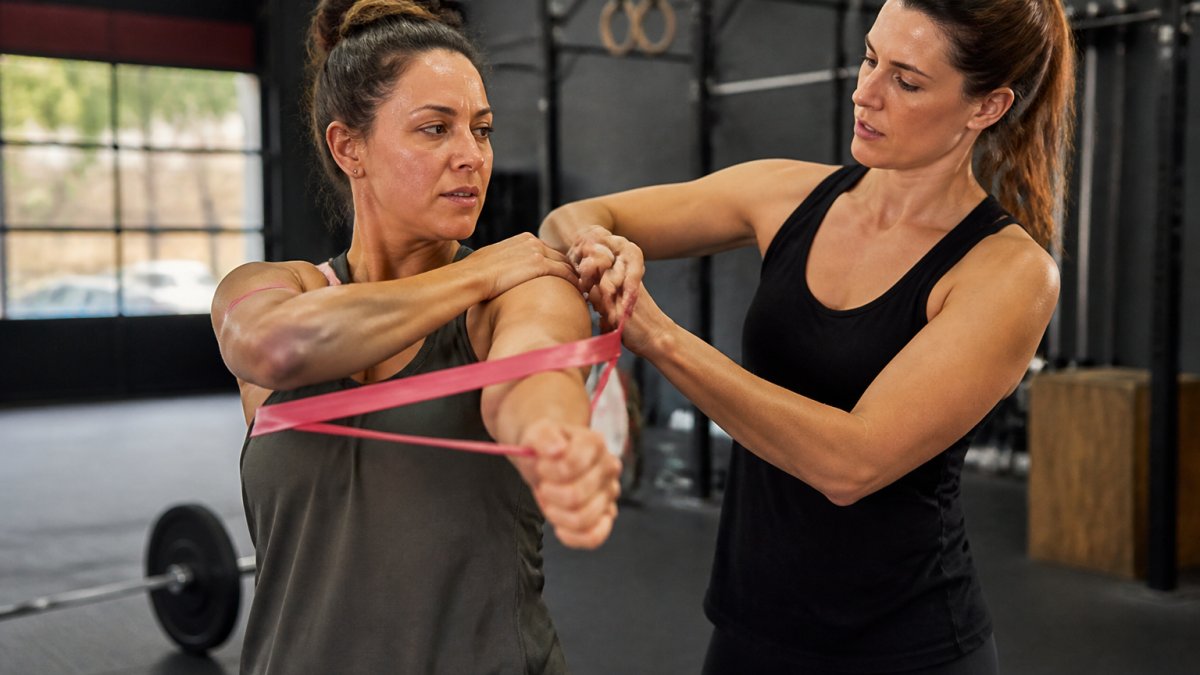
Banded external rotation: Bend your elbow 90 degrees at your side. Hold a band with tension.
Prone Y-T-W: Lie face-down on an incline bench.
Scapular pull-ups: Hang from a bar. Without bending your elbows, pull your shoulder blades down.
Dumbbell farmer carry: Hold a light dumbbell at your side. Walk 40 meters. Keep your shoulder packed (blade stable).
These exercises build the stability your shoulder needs to handle loaded movements.
CrossFit Shoulder Injury Recovery: Communicating With Your Coach
Your coach cannot scale your workout if they don't know what's wrong. Clear communication prevents re-injury and keeps you training safely.
Tell your coach:
- Which movements cause pain
- Your pain level during and after training
- What mobility work you're doing
- Your timeline (returning to full training in 4-8 weeks)
A good coach will build a modified version of the day's workout that keeps you moving without stressing the shoulder. You won't feel left out.
Warrior Welke CrossFit l/Hyrox coaches are trained to scale for injuries. Bring your assessment data to class. Show them your ROM limitations. Ask what alternatives fit the day's programming.
When to Stop Training and Seek Medical Care
Some shoulder pain is normal during training. Some is a warning sign. Know the difference.
Stop training immediately and see a doctor if you experience:
- Sharp, stabbing pain in the shoulder
- Sudden loss of strength or range of motion
- Pain that doesn't improve with 2-3 weeks of scaling
- Swelling or visible deformity
- Numbness or tingling down your arm
- Pain that wakes you at night
These signs suggest a more serious injury that needs professional evaluation.
Scaling for shoulder injuries works best for mild-to-moderate pain. Severe injuries need medical attention first.
Shoulder pain doesn't mean your CrossFit journey ends. It means you scale intelligently, build stability, and return stronger.
At Warrior Welke CrossFit l/Hyrox, we've guided countless athletes through shoulder injuries using this exact approach.
Frequently Asked Questions
How can I scale CrossFit workouts for a shoulder injury?
Start by identifying which movements trigger pain: overhead presses, pull-ups, or push movements. Replace them with pain-free alternatives like dumbbell rows, landmine presses, or machine work. Reduce training volume by 30-50% initially, then gradually increase as pain decreases. Work with your coach to modify rep schemes and weights. Monitor your pain during and after workouts, if pain increases the next day, you've done too much. A typical progression moves from complete avoidance, to modified ranges of motion, to light loading, then to full-range work over 4-8 weeks.
What are good alternatives to overhead movements when my shoulder hurts?
Replace overhead pressing with landmine presses, dumbbell floor presses, or machine chest presses that keep your shoulder in a safer plane. Substitute barbell thrusters with dumbbell goblet squats or kettlebell front squats. For push jerks and split jerks, use dumbbell push presses or trap bar deadlifts. Replace pull-ups with inverted rows, machine rows, or banded pull-downs. Rowing and lower-body dominant movements like squats and deadlifts remain excellent options. The key is maintaining training stimulus while protecting your shoulder joint.
Can I work out with a torn shoulder, or should I stop training completely?
Complete rest is rarely necessary. Most shoulder injuries improve faster with controlled movement than with immobilization. Work with a physical therapist or qualified coach to identify pain-free ranges of motion and movements. You can continue lower-body training, core work, and conditioning while modifying or avoiding upper-body movements that cause pain. Gradually reintroduce loaded shoulder work as your range of motion and pain improve. Pain that worsens during activity or persists for more than 2-3 weeks warrants evaluation by a healthcare provider before resuming full training.
How long does it take to return to full CrossFit training after a shoulder injury?
Recovery timelines vary widely depending on injury severity, your training history, and how consistently you follow a scaled program. Minor strains may improve in 2-4 weeks; more significant injuries can take 8-12 weeks or longer. A typical progression spans 4-6 weeks: weeks 1-2 focus on pain-free movement and mobility, weeks 3-4 introduce light loading and strength work, weeks 5-6 gradually increase volume and intensity. Return to full training only when you can perform all movements pain-free and your strength and range of motion match your uninjured side.